Build a Notion Kanban Board to Boost Productivity

At its core, a Notion Kanban board is a visual way to manage your projects right inside Notion. It organizes all your tasks into columns that show where each piece of work stands in your process. Think of it as far more than a digital to-do list—it's a flexible command center for your projects, giving you a bird's-eye view of your workflow and instantly flagging any bottlenecks.
Why a Notion Kanban Board Will Change Your Workflow
Most projects start to feel chaotic pretty quickly, right? You've got tasks floating around in emails, some notes in a random doc, and constant pings in your messaging apps. A Notion Kanban board cuts through that noise by creating a single, visual source of truth for everything.
Unlike a lot of rigid, single-purpose project management tools, Notion builds your Kanban board directly into your existing workspace. This means it lives right alongside your documents, notes, and other databases, turning it into an incredibly powerful and integrated hub for getting things done.
This isn't just about making things look pretty; it's about gaining real clarity. When you can see your entire workflow at a glance—from "To Do" to "In Progress" to "Done"—you get an immediate gut-check on a project's status that a simple list could never provide. You can instantly see where work is piling up, drag and drop a task to reassign it, and keep things moving without needing to schedule yet another status meeting.
Unlocking Unmatched Flexibility
The real magic of a Notion Kanban board is just how adaptable it is. It's not some one-size-fits-all template you're forced into. You can tweak and customize every single part to fit the way you actually work.
- Integrated Workspace: Every card on your board isn't just a task title; it's a full-blown Notion page. You can pack it with detailed notes, checklists, images, and even other databases.
- Custom Properties: Need to track deadlines, priority levels, or who a task is assigned to? Easy. Just add a custom property. You can also track things like project budgets, client names, or anything else that matters to your workflow.
- Multiple Views: This is a huge one. With a single click, you can switch from your Kanban board view to a calendar, a timeline, or a simple table to see the exact same information from a totally different perspective.
This kind of flexibility is a big reason why Notion has grown so fast. Now valued at $10 billion, its user base is full of micro, small, and medium-sized businesses that need tools that can bend and adapt to their unique needs.
Here’s a quick look at a simple project tracking setup. It's a clean, organized Notion Kanban board that gives you a crystal-clear overview of every task.
The interface neatly lays out columns for each stage, and the cards represent individual tasks, really showing off the visual workflow that’s at the heart of the Kanban method. Before we dive deep into building one, it helps to have a good handle on the platform itself. For a great all-around primer, check out this ultimate guide on how to use Notion to get the most out of it.
The greatest value of a Notion Kanban board is its ability to centralize information. When your project plan lives in the same space as your project documentation, you eliminate friction and keep your team perfectly aligned.
Getting comfortable with these features is the first step. To really level up your skills, you'll want to check out these 10 tips to help you get the most out of Notion.so.
Creating Your First Notion Kanban Board From Scratch
Alright, let's get our hands dirty and build your first Notion Kanban board. Forget about complicated templates for now; we're going to start with the bare essentials to get a working board up and running in just a few minutes. It's surprisingly simple, even if you're a complete Notion beginner.
The whole thing starts on a blank canvas. Kick things off by creating a new page in your workspace—just hit the + New page button in your sidebar.
Give your page a name that makes sense, something like "Content Workflow" or "Q3 Project Tracker." This isn't just a title; it sets the entire purpose for your board.

Once you've got a title, Notion will offer you a few choices in the body of the page. Find the "Database" section and click on Board. That one click is the magic moment that turns your empty page into the skeleton of a Kanban system.
Setting Up Your Core Workflow Columns
Your new board will pop up with some generic columns. Think of these as the lanes your tasks will move through from start to finish. The most effective setup, no matter the project, follows a dead-simple progression.
You can rename the default columns just by clicking on their titles. I've found that these three stages are the perfect starting point for almost anything:
- Not Started: This is your backlog. Every new idea, task, and to-do item lives here, waiting for its turn.
- In Progress: The active zone. Anything in this column is what you or your team is actively working on right now.
- Completed: The finish line. Dragging a card here gives you that little dopamine hit and creates a clean record of what you've accomplished.
These three columns are the backbone of a solid workflow. Sure, as you get more familiar, you might add a "For Review" or "On Hold" column, but starting simple is the key to actually sticking with it. The goal is to build something that mirrors how you really work, not a convoluted system you'll abandon in a week.
A common mistake I see is people over-engineering their boards from day one. Seriously, just start with three columns. You can always add more complexity later when you spot a real need in your workflow.
Adding and Managing Your First Tasks
With your columns ready, it's time to fill them up. In Notion, every task is a card. To make a new one, just click the + New button at the bottom of a column. For instance, under "Not Started," you could create a card called "Draft Q3 Marketing Report."
But here's where Notion's power really shines: each card isn't just a title. It's an entire page.
Click to open any card, and you can dump in checklists, detailed notes, files, images—whatever you need for that task. This depth is what sets a Notion board apart from more basic to-do list apps.
Let's say you're managing a blog. Your "Not Started" column might have cards for "Brainstorm October Post Ideas" and "Research Competitor Keywords." When you start working on the brainstorming task, you just grab that card and drag it over to "In Progress." It’s that simple, visual interaction that makes the Kanban method so effective. You can see your progress in real-time and know exactly where to focus your energy.
Customizing Card Properties for Ultimate Project Control
Okay, you've got the basic skeleton of your Kanban board. It works. But right now, it's just a set of columns with cards. The real magic happens when you start customizing the data on each of those cards. This is where Notion's properties turn a simple board into a project management powerhouse that actually works for you.
Properties are just data fields you add to your cards to track whatever you need. Think of them as custom labels that can hold everything from deadlines and team assignments to priority levels and file attachments. This is how you go from a basic to-do list to a rich, filterable database that gives you total command over your projects.
This level of customization means your board can adapt to pretty much any workflow. A software team might use properties to track bug severity and sprints. A content creator could track an article's journey from "Outline" to "Published." It's all about making the tool fit your process, not the other way around.
Adding and Configuring Essential Properties
Let's dive in. To get started, just open any card on your board and find the + Add a property button. Clicking this pops up a menu full of different property types, each one designed to hold a specific kind of information.
Imagine you're managing a content calendar for your blog. You absolutely need to know who's writing what, when it's due, and how important it is.
Here are the first three properties I'd add in that scenario:
- Assignee (Person property): This is for assigning the task to a team member. You just @mention anyone in your Notion workspace to hand off the work. It’s a simple move that brings immediate clarity to your team.
- Due Date (Date property): Obvious but critical. Adding a date property lets you set deadlines, which is the first step toward being able to visualize your tasks on a calendar or timeline later on.
- Priority (Select property): This one is great. The
Selectproperty creates a dropdown menu with single-choice options. You can create tags like High, Medium, and Low to give everyone a visual cue about what needs attention first.
With just those three properties, you’ve already transformed your board from a simple task list into a real project command center.
The real power isn't just in adding properties; it's in how they let you filter and sort your entire database. Suddenly, you can create a view that shows only 'High' priority tasks assigned to you that are due this week. That’s how you cut through the noise.
A Breakdown of Key Properties
To help you get started, I've put together a table of the most useful properties I find myself using again and again on Kanban boards.
| Property Type | Purpose | Example Use Case |
|---|---|---|
| Status | A dedicated property showing progress | Not Started, In Progress, Needs Review |
| Person | Assigns tasks to one or more people | Assigning a designer and a writer to a marketing asset. |
| Date | Sets deadlines or event dates | Setting the publish date for a blog post. |
| Select | A single-choice dropdown menu | Labeling a task's priority: High, Medium, Low |
| Multi-select | A multi-choice dropdown menu | Tagging a task with relevant departments: Marketing, Sales |
| Files & media | Attaches files directly to a card | Uploading the final design mockup for a task. |
| Created time | Automatically timestamps card creation | Tracking how long it takes to resolve a customer support ticket. |
Think of this table as your starter kit. You can always add more specialized properties later, but these will cover about 90% of what most teams need.
Going Further with Advanced Properties
Once you're comfortable with the basics, you can start layering in more advanced properties to handle more complex workflows.
Let's say a development team is using their Notion Kanban board to track bugs. Their cards might need a bit more detail:
- Status (Status property): Instead of simple columns, they could use the dedicated Status property for stages like
Backlog,In Dev,Testing, andFixed. - Reported By (Person property): To keep track of who first flagged the bug.
- Creation Date (Created time property): This property automatically logs when the card was created, which is super useful for measuring bug resolution time.
This level of detail turns your board into a pretty sophisticated bug-tracking system, all without leaving your workspace.
The key is to add only the properties you genuinely need. A cluttered card with dozens of fields is just as unhelpful as a blank one. My advice? Start with the absolute essentials and only add more as you find a real need for them. This keeps your system clean, effective, and easy for everyone to use.
Master Your Data with Filters, Sorts, and Views
A raw, unfiltered Notion Kanban board is great at first, but it doesn't take long for it to get crowded. Once you start piling in tasks, projects, and ideas, you'll hit a point where it feels more overwhelming than organized.
This is where you graduate from just using Notion to truly commanding it. By getting a handle on filters, sorts, and custom views, you can turn that chaotic list of cards into a dynamic dashboard. It becomes a tool that shows you exactly what you need to see, right when you need to see it.
Instead of manually scanning for your tasks or trying to remember which project is on fire, you build systems that bring that information to the surface automatically. Your board stops being a digital corkboard and starts acting like an intelligent assistant.
Focus Your View with Powerful Filters
Think of filters as your first line of defense against information overload. They let you hide cards that aren’t relevant to what you’re doing right now, giving you a clean, distraction-free look at your workflow. It’s like telling your board, "Only show me tasks that meet these specific conditions."
Imagine you're on a content team, and the main project board is packed with dozens of active cards. Digging through that to find your specific to-dos is a pain. With a filter, you can solve this in seconds.
Here’s how that might look:
- Create a "My Tasks" view: Add a filter where the
Assigneepropertyisyou. Instantly, all other cards disappear. - Isolate urgent items: Add another filter where the
PrioritypropertyisHigh. Now you’re only looking at your most critical tasks. - Focus on upcoming deadlines: Combine these with a third filter where the
Due Dateis on or beforenext week.
Just like that, you’ve built a personal dashboard that cuts through all the noise and highlights your immediate action items.
You can also chain multiple "AND" or "OR" conditions to create some incredibly specific views. For example, show me all tasks that are
Highpriority OR areoverdue. This is how you start making your Notion Kanban board work for you, not against you.
Automatically Organize Cards with Sorts
Okay, so you’ve filtered your view down to just the right cards. The next step is to organize them. That's where Sorts come in. Sorting rules automatically arrange the cards within each column based on the criteria you set, making sure the most important stuff naturally floats to the top.
Without any sorting, new tasks often just pile up in the order they were created. A simple sort rule can bring instant order to that chaos. For example, setting a rule to sort cards by Due Date (Ascending) will push tasks with the nearest deadlines to the top of each column. It's a simple change, but it's an incredibly effective way to visually prioritize your day.
For even more control, you can layer your sorts. You might set your primary sort to be Priority (Descending) and a secondary rule to be Due Date (Ascending). With this setup, all your "High" priority tasks will group at the top, and within that group, they’ll be neatly ordered by the soonest due date.
Creating Multiple Views for Different Perspectives
This is where the real magic happens. A Notion Kanban board isn't just a board; it's a database. And that database can be visualized in multiple ways, which Notion calls Views. You can have your primary Kanban layout, a calendar for deadlines, and a simple table for data analysis—all pulling from the exact same set of cards.
This flexibility is a major reason Notion has become so popular, especially with a younger, digitally native crowd—a whopping 79% of its users are under 44 years old. You can find more insights about Notion's user demographics on enlyft.com. It’s not just a to-do list; it’s a full-blown information hub.
Picture a project manager overseeing a product launch. They could create several views from their single "Product Launch" database:
- Main Kanban Board: The default view for tracking the day-to-day workflow from "Backlog" to "Launched."
- Marketing Calendar View: A view showing only marketing-related tasks on a calendar, organized by their
Due Dateproperty. - Team Lead View: A filtered Kanban view showing only high-level tasks assigned to the team leads.
- Full Data Table: A table view with every single property visible—perfect for exporting data or doing a comprehensive review meeting.
Each of these views can have its own unique set of filters and sorts. This means you can build specialized dashboards for different people or purposes without ever duplicating data. It’s the ultimate way to get the right information to the right person, at the right time.
Automating Your Workflow with Key Integrations
<iframe width="100%" style="aspect-ratio: 16 / 9;" src="https://www.youtube.com/embed/5JaGJBPC0Q8" frameborder="0" allow="autoplay; encrypted-media" allowfullscreen></iframe>
While dragging and dropping cards is satisfying, the real productivity leap happens when you put your repetitive tasks on autopilot. Your Notion Kanban board can become a central hub that automatically reacts to triggers from other tools you use every day, saving you from countless hours of mind-numbing data entry. This is where you connect your board to the rest of your digital world.
Notion does have some simple built-in automations to get you started. For example, you can set up rules that automatically change a property when a card lands in a new column or assign a task to a specific person once its status changes. These are great for keeping your board clean, but the real power lies in connecting to third-party services.
Connecting to Your Digital Ecosystem
This is where your Kanban board goes from being a standalone planner to the beating heart of your operations. The key? Integration platforms.
- Zapier and Make: Think of these services as bridges connecting Notion to thousands of other apps. You can build "recipes" or "scenarios" that link your board to Slack, Google Calendar, or Jira, turning it into a truly interactive command center.
- Email Integration: Manually copying info from your inbox into task cards is a massive time-sink. A dedicated tool like NotionSender lets you forward an email straight to your board, where it automatically pops up as a new task card, complete with the email's content and any attachments.
The real goal of automation isn't just about saving time—it's about reducing friction. When you can add a task to your board without ever leaving your inbox, you're far more likely to capture every important detail and keep your workflow humming along smoothly.
A Game-Changing Email Workflow
Picture this: a client sends you an email with an urgent request. Instead of switching apps, opening Notion, creating a new card, and then copying and pasting the details, you just forward the email to a unique address. Instantly, a new card appears in your "Not Started" column, fully populated.
This direct email-to-board pipeline is incredibly powerful for service-based businesses, sales teams, or frankly, anyone who lives in their inbox. It ensures no request gets lost in the shuffle. If you're looking to build out more custom connections, you can review the NotionSender API documentation for more advanced options.
This visual breaks down a simple flow for mastering your Notion data, moving from basic filtering and sorting to creating customized, dynamic views.
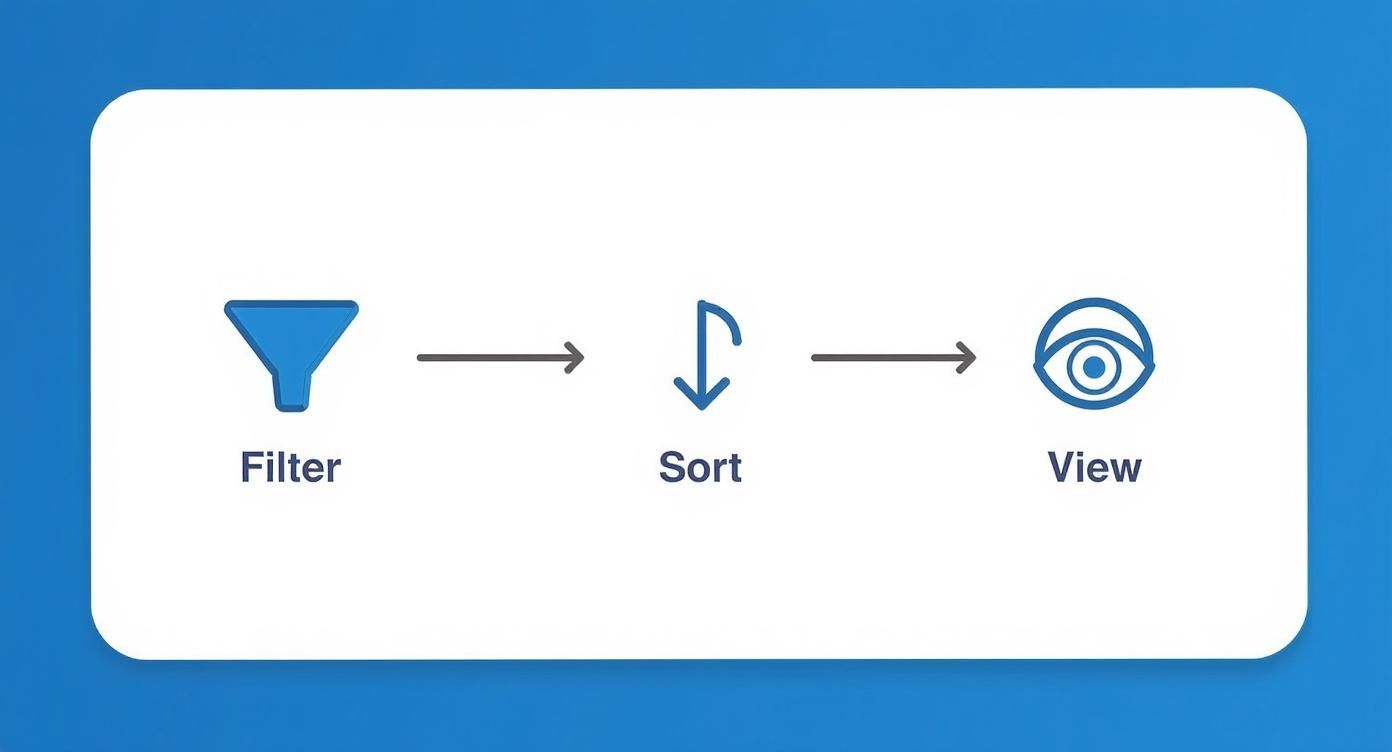
This process really highlights how getting your data organized is the foundation for building powerful automations. Beyond Notion's native features, you can seriously level up your processes when you explore various no-code automations and see what's possible.
Common Questions About Notion Kanban Boards
As you start weaving Notion's Kanban board into your daily workflow, a few questions are bound to surface. I've seen these pop up time and again with teams I've worked with. Let's tackle some of the most common ones to help you get the most out of your setup.
Can a Notion Board Really Work for a Team?
One of the biggest questions is whether a Notion board can truly handle team collaboration. The answer is a resounding yes. Notion was built from the ground up for shared work.
You can easily assign tasks to specific people using the Person property. Need to discuss something? Just drop a comment right on the task card itself. You can even @mention teammates to ping them with a notification, which keeps all the important conversations tied directly to the work being done. No more hunting through Slack threads.
How Do You Handle Sub-Tasks and Complex Projects?
This is another big one. What do you do when a single card isn't enough? Notion gives you a couple of great ways to handle this.
For simple to-do items, you can drop a Checklist block right onto a card's page. This is perfect for breaking down a straightforward task into smaller, concrete steps you can tick off as you go.
When you're dealing with more complex work, the best way to go is to create a totally separate database just for sub-tasks. Then, you link it back to the main task using a Relation property. This approach is powerful because it lets you track the status, owner, and due date for every single sub-task individually, all while keeping a clear link to the parent project card.
The real magic of a Notion Kanban board—what sets it apart from a tool like Trello—is its incredible flexibility. Trello is a fantastic, laser-focused Kanban tool. Notion, on the other hand, is an entire workspace where your board is just one way of looking at a much more powerful database. That same database can instantly become a calendar, a table, or a gallery.
This all-in-one nature allows for much deeper customization. Every card on your board is a full-fledged document, and the board itself can be linked to your company wiki, meeting notes, and other project data.
This connectivity can even bridge the gap between Notion and other tools you use every day. For instance, you can easily figure out how to create and send email from Notion, bringing even more of your workflow under one roof.
Ready to connect your email to your project board? With NotionSender, you can turn emails into actionable tasks without ever leaving your inbox, keeping your workflow perfectly synchronized. See how it works at https://www.notionsender.com.