
Notion progress bar: Build a dynamic tracker with formulas and visuals
A Notion progress bar is more than just a formula; it's a visual way to track how close you are to hitting a goal or finishing a project. It takes abstract numbers and turns them into a tangible, motivational graphic that lives right inside your dashboards. Honestly, it's a far more powerful way to see your status at a glance than just staring at a plain percentage.
Why a Visual Progress Bar Transforms Your Notion Workspace
Before we dive into building one, it’s worth understanding why a progress bar is so much more than a cosmetic tweak. It’s a powerful psychological tool that turns a boring, static task list into a dynamic dashboard that actually encourages you to take action and gives you a real sense of clarity.
Let's face it, static numbers on a page are easy to ignore. A visual tracker, on the other hand, gives you immediate feedback and a clear sense of momentum. If you're a project manager, this means no more digging through endless task lists just to gauge a project's health. And for freelancers, it’s a constant, satisfying reminder of how much you've accomplished on a client project, which is great for keeping motivation high.
Boosting Productivity and Motivation
There's just something satisfying about watching a bar fill up. It taps directly into our brain's desire for completion and reward. Every little bit of progress feels like a small win, creating a positive feedback loop that keeps you going. This is especially true for long-term projects where the finish line feels miles away. Imagine a writer tracking book chapters—seeing that bar move, even a little, makes the final page count feel way less overwhelming.
This visual feedback really shines in a few key ways:
- Instant Clarity: You get an immediate gut-check on a project's status without having to read a single line of text.
- Enhanced Motivation: That visual proof of progress creates a genuine sense of achievement that pushes you forward.
- Improved Accountability: When you share a progress bar with a team, it keeps everyone aligned and aware of how their work contributes to the bigger picture.
Real-World Impact in Modern Workflows
The need for a good Notion progress bar has grown right alongside the platform itself. As remote and hybrid work became the norm, Notion’s user base exploded from 1 million in 2019 to over 100 million today, and visual trackers like these are now a core part of how many people work.
For example, a sales team can track their quarterly revenue goal, watching the bar inch closer with every single deal they close. This gets even better for NotionSender users—they can automatically save incoming invoices to a database and watch a progress bar fill up as each payment is processed, all without lifting a finger. If you want to get more out of your own setup, check out our guide on essential tips for mastering Notion.
Building Your First Percentage-Based Progress Bar
Alright, let's get our hands dirty and build the most fundamental type of progress bar in Notion. This version is clean, simple, and gives you a straightforward percentage of completion. Once you nail this basic setup, you'll be ready to tackle the more complex and visual trackers later on.
We'll start with a simple database. Let's pretend you're a content manager trying to track your monthly blog calendar. The goal is to see, with just a quick glance, how close you are to publishing all the articles planned for the month.
Setting Up the Essential Properties
Before we can touch a formula, we need the raw data to fuel it. Hop into your Notion database and create two essential properties. These are the inputs for our calculation.
- Tasks Completed: First, create a property named "Completed" and set its type to Number. This is where you'll manually punch in how many tasks (or articles, in our example) you've finished.
- Total Tasks: Next, create a second property called "Total" and also set it to Number. This one represents the total number of tasks needed to hit 100%.
For our blog calendar, you might have 12 in the "Total" property and just update the "Completed" number each time an article goes live. Keeping these two numbers accurate is the only manual work you'll need to do.
Crafting the Core Notion Formula
With your number properties ready to go, it’s time for the fun part. Create a new property, name it something like "Progress," and choose the Formula type. This is where we tell Notion how to actually calculate the percentage.
Click "Edit" on your new formula property and drop in this simple line:
prop("Completed") / prop("Total")
So, what does this actually do? The prop() function tells Notion to look at another property in the same row and grab its value. You're basically saying, "Take the number from the 'Completed' column and divide it by the number in the 'Total' column."
My Two Cents: This simple division is the engine behind every percentage-based progress bar. It spits out a decimal between 0 (for 0%) and 1 (for 100%), which is exactly what Notion needs to draw the visual bar.
After you save the formula, click on the "Progress" property's title to open its menu. Find the "Edit property" option. At the bottom, you’ll see choices for how to display the data: "Number," "Bar," or "Ring." Go ahead and select Bar. You can even pick a custom color.
Just like that, your database now has a dynamic visual tracker. If you have 6 completed articles out of a total of 12, the formula calculates 6 / 12 = 0.5, and Notion shows a bar that's exactly half-full. It’s an incredibly popular trick among freelancers who need that little visual push to keep their projects moving forward—a recent study on Notion usage backs this up.
This basic percentage bar is the perfect entry point. It gives you immediate, clear feedback and lays the groundwork for creating even cooler visual trackers down the road.
Sure, a simple percentage is functional, but let's be honest—it lacks a bit of personality. Using an emoji-based progress bar is a fantastic way to spice up your dashboards and make your trackers more engaging. Instead of a plain bar, you can use any character you like. Classic squares (■), motivational stars (★), or even custom icons that fit your project's theme are all fair game.
This little trick transforms a dry metric into something you can actually feel. A number is abstract, but seeing a row of ten stars slowly fill up as you hit your weekly sales goals feels like a genuine win. It’s a small design choice that can have a surprisingly big impact on how you connect with your workspace. This kind of visual feedback is a huge reason why so many people swear by Notion for managing their work.
The Formula Behind the Visuals
To pull this off, we'll need a slightly more advanced formula that literally draws the bar for us. The core idea is simple: we calculate what percentage of the bar should be "filled" versus "empty," and then use emojis to represent each state.
The magic happens when a few key Notion functions team up:
slice(): Think of this function as a pair of scissors for text. We’ll use it to cut out the exact number of emojis we need.repeat(): Just like it sounds, this lets us repeat a character a certain number of times to create our "filled" and "empty" sections.round(): This one just cleans up our math, making sure we’re always working with whole numbers for each segment of the bar.
By stringing these together, we can build a dynamic and visual representation of any percentage. The result is a clean, intuitive notion progress bar that's way more appealing than a plain old number.
The goal is to translate a percentage into a visual length. For example, if your progress is at 70% and your bar has ten segments, the formula will display seven filled emojis and three empty ones.
Building Your Emoji Progress Bar
Alright, let's walk through creating a 10-segment emoji bar. First, make sure you have a "Progress" formula property in your database that's already calculating the percentage (something like prop("Completed") / prop("Total")). Now, create a new formula property, call it "Emoji Bar," and paste this snippet in:
slice("★★★★★★★★★★", 0, round(prop("Progress") * 10)) + slice("☆☆☆☆☆☆☆☆☆☆", 0, 10 - round(prop("Progress") * 10))
So, what’s this formula actually doing? Let's break it down.
The first part, slice("★★★★★★★★★★", 0, round(prop("Progress") * 10)), takes your progress percentage (say, 0.7 for 70%), multiplies it by 10 to get 7, and then slices out the first seven filled stars (★) from our string of ten.
The second part handles the leftovers. It calculates how many segments are left (10 - 7 = 3) and slices out that many empty stars (☆) to show the remaining work. The + in the middle simply sticks the two parts together.
This level of customization is a huge part of Notion's massive growth, which now includes over 100 million users globally. A meaningful portion of its 4 million paying customers cite advanced progress tracking as a critical feature for improving their workflow efficiency. You can dive deeper into these numbers with some great Notion user growth stats from sqmagazine.co.uk.
Comparison of Progress Bar Types
Not sure which progress bar is right for you? Each style has its own strengths. This quick table breaks down the differences to help you decide.
| Bar Type | Formula Complexity | Visual Impact | Best For |
|---|---|---|---|
| Simple Percentage | Low | Low | Quick, no-fuss progress tracking where the number is all that matters. |
| Basic Emoji Bar | Medium | Medium | Adding a bit of visual flair to personal dashboards, habit trackers, or simple task lists. |
| Progress Rollup | High | High | Complex project management with nested tasks, team dashboards, and client-facing reports. |
Ultimately, the best choice depends on what you're tracking. For a personal goal, an emoji bar is great. For a massive team project, a rollup is probably the way to go. Don't be afraid to mix and match across your workspace
Tracking Large Projects with Rollup Progress Bars
Simple progress bars are great for a single checklist or a personal goal, but what happens when you’re managing a beast of a project with dozens of moving parts? You can't be stuck manually updating a master percentage. You need a bird's-eye view that pulls everything together automatically.
That's where the magic of Notion's Relation and Rollup properties comes in. By linking two separate databases—one for your high-level projects and another for the individual tasks—you can build a master progress bar that’s always accurate. It’s the perfect setup for a project lead who needs to see the status of multiple initiatives from a single, clean dashboard.
Connecting Your Projects and Tasks
The whole system hinges on the relationship between two databases. Let's say you have a "Projects" database and a "Tasks" database. The first thing you need to do is link them.
- In your "Projects" database, create a new property.
- Pick the Relation property type.
- Just find your "Tasks" database from the list and confirm it.
That’s it. Now, every project can be tied to its specific sub-tasks. A project like "Q3 Marketing Campaign" can be directly linked to individual to-dos like "Draft Ad Copy," "Design Social Graphics," and "Launch Email Sequence."
Configuring the Rollup for Automatic Tracking
Once the connection is made, the rollup property can get to work. Think of a rollup like a smart little assistant that peeks into your related database, grabs the information you need, and displays it right where you want it.
Back in your "Projects" database, add another new property and choose the Rollup type. When you set it up, you'll see a few options:
- Relation: Choose the "Tasks" relation you just created.
- Property: Pick the property from your "Tasks" database you want to measure. This is usually something like a "Status" property or, more simply, a "Done" checkbox.
- Calculate: This is the key. You have a few choices here, but for our goal, the most direct is "Percent checked." This works perfectly if you're using a checkbox for completed tasks.
When you select "Percent checked," Notion does the math for you, calculating the percentage of related tasks that have been ticked off. Just set the display for this rollup to "Bar," and you've got a fully automated project progress bar.
This method is a total game-changer for team leads. I once had to manage several development sprints at the same time. By rolling up the 'Done' checkboxes from our 'Sprints' task database, my 'Features' dashboard always showed a live, accurate completion percentage for every feature. No more manual updates for me.
This diagram breaks down how Notion turns that raw percentage into a clean visual bar.
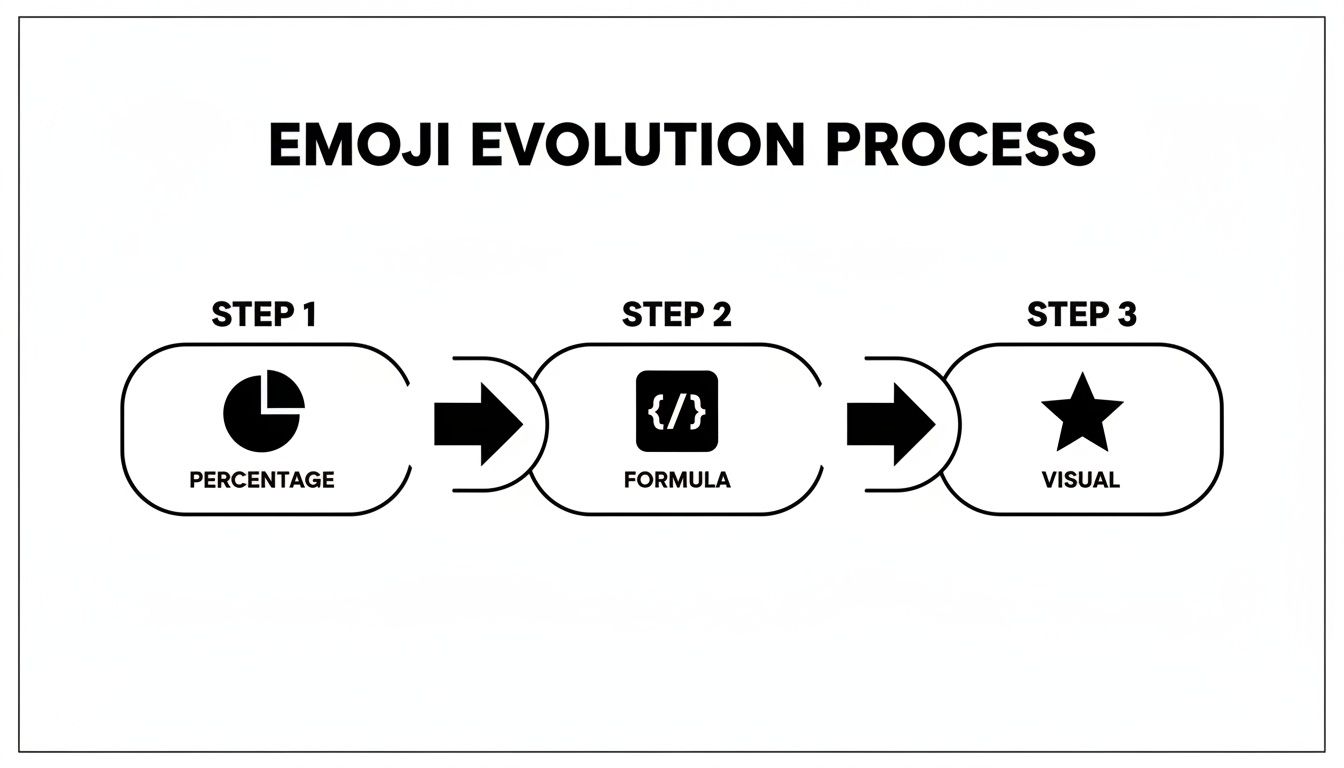
You can see how a simple number gets translated into an intuitive icon, turning abstract data into an at-a-glance status update.
This kind of integrated tracking is a huge reason behind Notion's explosive growth. By 2024, the company was pulling in an impressive $400 million in annual revenue, a jump of almost 500% from 2022. It shows just how much people value features like this to meet project deadlines and keep work organized.
And if you’re looking to streamline your workflow even further, you might want to check out our guide on using Notion to send and manage emails.
Let Your Progress Bars Update Themselves
Manually updating your progress bars is fine, but let's be honest, it's a chore. The real magic happens when you connect them to the outside world. This is the leap from a static to-do list to a live, automated dashboard that reflects what’s actually happening—without you lifting a finger.
Imagine a client sends you an email with the subject "Project Phase Approved." Instead of you having to stop what you're doing, find the right Notion database, locate the task, and check it off, an external tool can catch that email and do it all for you. The instant it arrives, your progress bar inches forward. That's real-time visibility.
Connect Your Email Directly to Notion
This is exactly what tools like NotionSender were built for. By giving your Notion database its own unique email address, you create a direct pipeline for information to flow right in. You can then set up simple rules to listen for keywords in incoming emails, like 'Complete' or 'Approved,' and trigger actions in your database automatically.
For freelancers or anyone juggling multiple client projects, this kind of setup is a lifesaver.
- A payment confirmation email from a client can instantly mark an invoice task as "Paid."
- An approval email from a key stakeholder can automatically check off a "Final Review" task.
- Automated reports hitting your inbox can update data points that feed directly into a project goal's progress.
And this isn't just a hack for solo operators. Over 50% of Fortune 500 giants like Amazon and Nike use Notion, often with high-level dashboards to track major objectives. The principles are the same, just at a massive scale.
Connecting your tools isn't just about saving time. It's about eliminating the tedious, repetitive data entry that drains your focus. Your dashboards will always show the true state of your work, meaning your decisions are always based on live, accurate information.
To get this working smoothly, you're essentially applying the principles of automated data processing to your own workspace. It ensures data flows between your apps, keeping everything perfectly in sync.
If you're ready to build these connections yourself, a great place to start is the official NotionSender API documentation. Building this simple bridge between your inbox and your workspace is what makes your progress tracking genuinely seamless.
Got Questions? Common Notion Progress Bar Hiccups
Even with the best guide, it’s totally normal to hit a few snags when you're building your first Notion progress bar. Notion formulas can be a bit picky, and sometimes the logic just doesn’t click right away. This section is all about tackling those frequent questions and troubleshooting the little issues that pop up.
Think of this as your go-to reference for fixing those small annoyances. Getting these details right—from pesky formula errors to visual tweaks—is what will make your dashboard genuinely useful.
Can I Make a Progress Bar Without a Formula?
You can, but it won't be automatic. While a dynamic, self-updating progress bar needs a formula, you could rig up a simple manual version.
For instance, a "Select" property with color-coded options like 'Not Started,' 'In Progress,' and 'Complete' gives you a basic visual cue. The big downside? You have to update it by hand, which completely misses the point of the automation that makes formula-based bars so powerful for managing projects.
My Progress Bar Formula Is Showing an Error
Formula errors in Notion almost always boil down to two culprits: typos in your property names or wonky syntax.
First, go back and meticulously check that the property names inside prop() match your database properties exactly. I'm talking capitalization, spaces, everything. A classic mistake is typing prop("completed") when your property is actually named prop("Completed").
Next, make sure you're using straight quotes (") and not curly quotes (“ ”). This happens all the time when you copy and paste code from a website or document. Finally, double-check that the properties you're dividing are both set to the 'Number' type. If they aren't, you'll get a data mismatch error.
My biggest tip is to build your formulas piece by piece. Start with a simple division, see if it works, and then start adding the more complex stuff like
slice()orif(). It makes finding the source of an error so much easier.
Can I Combine an Emoji Bar and a Percentage?
Absolutely, and it's actually one of my favorite ways to display progress. You get a quick visual and a precise number. You can pull this off by simply joining the emoji bar formula with your percentage calculation using the + operator.
First, you'll build the emoji bar part of the formula. Then, just add a space (" " ) and tack on the format() function to show the calculated percentage as text with a '%' symbol. It really gives you the best of both worlds in a single property.
What if My Progress Bar Goes Over 100 Percent?
Yep, this can definitely happen, especially if you're just dividing completed tasks by total tasks and then end up adding more completed tasks than you originally planned for. The fix is to wrap your formula in a conditional check.
Just use an if() function. Tell it to check if the result of your calculation is greater than 1. If it is, have the formula return 1 (which represents 100%). Otherwise, it should just return the actual calculated value. This simple trick ensures your progress bars are always cleanly capped at 100%.
Ready to put your progress tracking on autopilot? NotionSender connects your email directly to your Notion databases. Imagine approvals, invoices, and client updates automatically checking off tasks and moving your progress bars for you. Start automating your workflow with NotionSender today.

