Notion Travel Planner: Master the notion travel planner for seamless trips
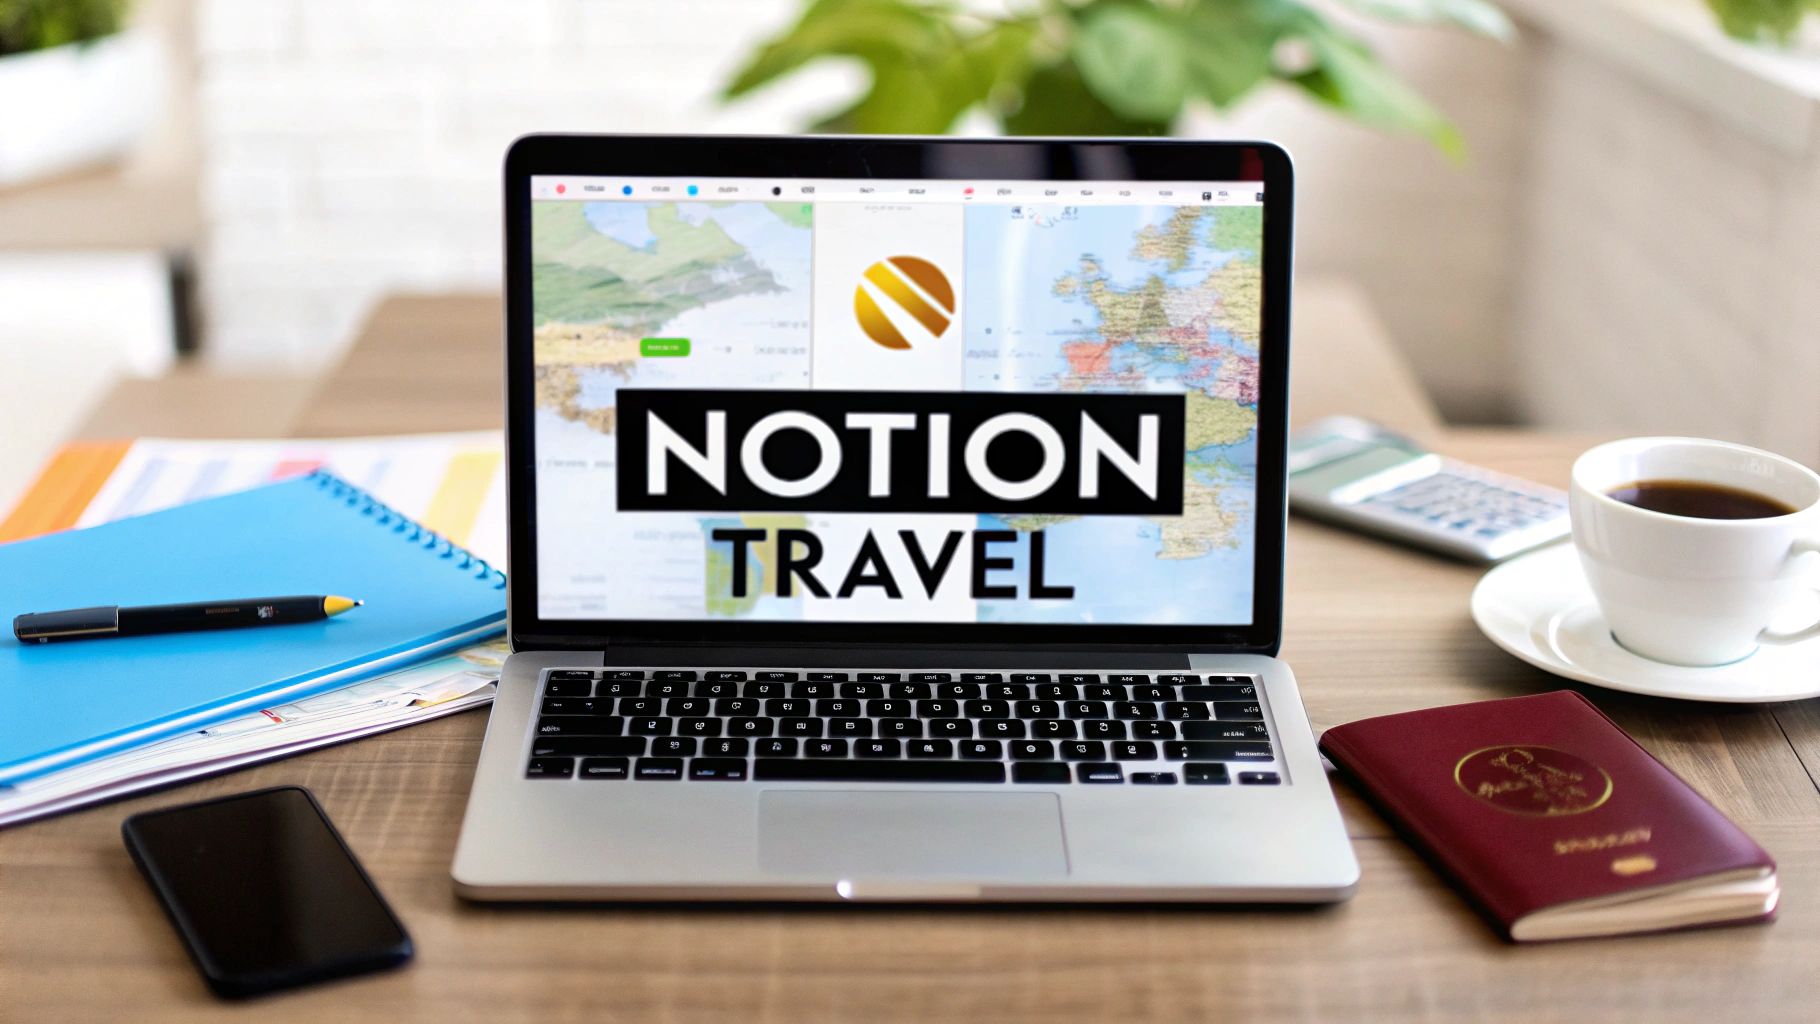
A Notion travel planner is your own custom-built, digital command center for organizing everything related to a trip. Think of it as the ultimate replacement for scattered spreadsheets, random notes, and a messy inbox. Instead, you get a dynamic, visual, and often automated system that turns the chaos of planning into a genuinely smooth experience.
Why Build a Custom Notion Travel Planner
If you've ever found yourself juggling a spreadsheet for the budget, a dozen browser tabs with ideas, and an inbox overflowing with booking confirmations, you know the feeling. It's a disjointed process that often leads to missed details and last-minute panic. Honestly, it's just an outdated way to plan travel.
The real magic of using Notion is its incredible flexibility. Unlike rigid, one-size-fits-all travel apps, Notion lets you build a system that perfectly mirrors your specific travel style.
A Notion travel planner isn’t just about storing information; it’s about creating an interactive dashboard that brings all your trip details together in a meaningful way.
The Benefits of a Centralized System
Instead of constantly switching between apps, a well-designed Notion workspace puts everything in one place. This guide will walk you through building a planner that grows with your trip, from the first spark of an idea to the final day of your journey. You'll end up with a single source of truth for every piece of travel information.
This approach offers some huge advantages:
- Complete Consolidation: Keep flight details, hotel reservations, daily itineraries, and budget tracking all inside one interconnected system. No more hunting around.
- Visual Planning: Use calendars, galleries, and maps to actually see your plans laid out. This makes it so much easier to spot scheduling conflicts or find gaps for spontaneous fun.
- Total Customization: You build the exact planner you need. It doesn't matter if you're a weekend backpacker or a digital nomad planning a multi-month trip.
- Powerful Automation: Integrate tools that can automatically save your booking emails and pull out the important data, saving you from mind-numbing manual entry.
We're going to start with the foundational databases and work our way up to advanced automations, transforming your planning process from a chore into a seamless part of the adventure. For more ideas on getting the most out of the platform, check out these 10 tips to help you get the most out of Notion.
Building Your Core Travel Databases in Notion

The secret to a killer Notion travel planner isn't some overly complicated, flashy template. It's actually built on a few simple, interconnected databases that do all the heavy lifting for you. Think of them as smart, digital file folders. We're going to start by building the three that matter most.
The first, and most important, is your Trips database. This is the big picture, the master list for every single adventure. Each entry here represents one trip, whether it’s a quick weekend getaway or a month-long backpacking journey.
Defining Your Trips Database
To make this database truly useful, you need to add some properties—what Notion calls its fields—to capture the essential info. I always start with these basics:
- Destination: A straightforward
Textproperty to name the place. - Dates: A
Dateproperty is perfect here; make sure to toggle on the end date. - Status: I use a
Selectproperty with options like 'Idea,' 'Planning,' 'Booked,' and 'Completed.' This helps me see my travel pipeline at a glance. - Cover Photo: A
Files & Mediaproperty lets you drop in an inspiring image to get you excited.
Just with this simple setup, you get a clean, high-level overview of all your past and future travels. You can instantly see what's locked in and what's still just a daydream.
Connecting Itineraries and Bookings
Next up, you’ll create an Itinerary database. This is where the day-to-day plan for each trip lives. The magic happens when you link it back to your Trips database using a Relation property. Now, every single activity—from a museum visit to a dinner reservation—is directly tied to its parent trip. No more confusion.
Finally, a Bookings & Documents database is your digital binder for all confirmations. This is where you'll stash flight details, hotel reservations, car rental info, and tour tickets. The real power move, though, is automating how you fill this database.
With remote work having surged by 25% post-2023 in places like the US and Europe, more and more people are using tools like NotionSender to forward booking confirmations straight from their inbox into Notion. It centralizes every important email and can even pull out key data like flight numbers or check-in times automatically.
By connecting these three databases, you're not just making lists. You're building a relational system where an itinerary item isn't just a random event; it's an activity tied to a specific trip, with its booking confirmation living right alongside it.
Once your core databases are set up, you can start plugging in the details for exciting trips, like this ultimate 1-week Costa Rica adventure itinerary. You'll find it's way more efficient than trying to manage a scattered mess of emails and documents.
This interconnected structure is what lets you create powerful custom views later. Imagine a calendar that pulls all your flight dates from the Bookings database, or a beautiful gallery of trip ideas from your Trips database. The possibilities get even bigger when you start exploring the different ways to use Notion to send emails, like scheduling reminders or follow-ups.
Here's a quick rundown of the essential properties I recommend for each of these core databases. This table should give you a solid starting point for building out your own system.
Essential Database Properties for Your Notion Travel Planner
| Database | Property Name | Property Type | Purpose |
|---|---|---|---|
| Trips | Destination | Text |
The primary location of the trip. |
| Dates | Date |
Start and end dates for the trip. | |
| Status | Select |
Tracks the planning stage (e.g., Idea, Planning, Booked). | |
| Cover Photo | Files & Media |
An inspiring image for the trip's cover. | |
| Itinerary | Relation |
Links to related items in the Itinerary database. | |
| Bookings | Relation |
Links to related items in the Bookings database. | |
| Itinerary | Activity | Title |
The name of the event or activity. |
| Trip | Relation |
Links back to the corresponding trip in the Trips database. | |
| Date & Time | Date |
The specific date and time for the activity. | |
| Category | Select |
Type of activity (e.g., Food, Tour, Transit). | |
| Booking | Relation |
Links to the specific booking confirmation, if any. | |
| Bookings | Booking Name | Title |
A clear name for the booking (e.g., Flight to SJO). |
| Trip | Relation |
Links back to the main trip. | |
| Type | Select |
Category of booking (e.g., Flight, Hotel, Car). | |
| Confirmation # | Text |
The confirmation or reference number. | |
| Document | Files & Media |
Upload the actual PDF or email confirmation. |
Getting these properties right from the start saves a ton of headaches later. It ensures all your data is structured, connected, and easy to find when you're on the go.
Right, so you've built out your core databases. That's a solid foundation, but let's be honest, staring at raw tables isn't exactly inspiring—or useful when you're rushing to catch a train. The real magic happens when you build a central dashboard that pulls all that information together into views you'll actually use.
This is where your planner goes from being a glorified spreadsheet to your personal travel command center.
First things first, create a brand new, empty page in Notion and give it a name like "Travel Hub" or "My Adventures." This is going to be your home base. Now, instead of making new databases here, we're going to pull in the ones we already built. Just type /linked view of database and select your Trips and Itinerary databases. This is a game-changer because it lets you display the same core information in a bunch of different ways without ever duplicating your work.
Crafting Your High-Level Trip Views
The first thing I always add is a Calendar view of my Trips database. It gives me that perfect bird's-eye look at the entire year. You can instantly see how your travels are spaced out, spot any potential scheduling conflicts, and just get a feel for the rhythm of your year. It's fantastic for long-term planning.
Next up, let's add a bit of inspiration. Create a Gallery view of that same Trips database. This is your visual dream board. Go into the view's settings and configure it to show the cover photo you added for each destination. Then, set up a filter to only show trips with the status "Idea" or "Planning." What you get is a beautiful, visual bucket list that practically begs you to start booking your next getaway.
A great dashboard isn't just about storing information; it's about showing you the right thing at the right time. Your calendar shows you when you're going, the gallery shows you where you could go, and a Kanban board shows you what you need to do next.
The third pillar of my travel dashboard is a Kanban board grouped by the "Status" property. This is pure organizational bliss. You can literally drag and drop your trips from the "Idea" column over to "Planning" and finally into "Booked." It’s a surprisingly satisfying way to watch your travel plans firm up and come to life.
Building Practical, On-the-Go Views
A planner that's only useful at your desk is a planner you won't use. It needs to work for you when you're out there, in the middle of your trip. This is where creating specific, filtered views inside each trip page becomes incredibly powerful.
Go into one of your trip pages (you can make this part of your Trip Template later). Create a linked view of your Itinerary database right there on the page.
Here's the trick that makes it so useful: apply a smart filter.
- Create a filter where "Date" is "Today."
That's it. It’s that simple.
Now, when you pull up that trip page on your phone while standing in the middle of Rome, you won't be scrolling through a monster list of every single thing you planned. You'll just see a clean, focused agenda with only today's activities. This little tweak transforms your planner from a static document into a dynamic, live guide for your day.
Automating Your Bookings with Email Integration
Alright, your Notion travel planner is starting to look pretty sharp and organized. But now it’s time for the real magic: making it intelligent. Let's be honest, nobody enjoys manually copying flight confirmation numbers, hotel addresses, and reservation details. That’s exactly the kind of tedious busywork that invites typos and sucks up your precious planning time.
This is where a little bit of automation completely changes the game.
By connecting your 'Bookings & Documents' database to an email tool, you can pretty much eliminate manual data entry. It sounds complicated, but it's not. A service like NotionSender generates a unique, private email address that links directly to your database. Think of it as a special delivery entrance just for your travel plans.
Picture this: you've just booked your flight to Tokyo. The airline confirmation hits your inbox. Instead of the old routine—switching to Notion, creating a new entry, and painstakingly typing out the flight number, departure time, and PNR—you do something far simpler.
You just forward the email to your database's unique address. That's it.
The Magic of Automated Data Entry
Within moments, a new item pops up in your 'Bookings & Documents' database. The system is smart enough to parse the email, find the important bits, and put them in the right place. The airline's name gets tagged, the confirmation number lands in its own field, and the flight dates are logged correctly without you lifting a finger.
This isn't just about shaving off a few minutes. It builds a bulletproof, error-free system, ensuring no critical detail ever gets buried in a messy inbox. Every single booking, receipt, and ticket is captured and categorized for you.
This simple workflow—moving from structured databases to a clean dashboard and finally to an on-the-go itinerary—is the core of an effective planner.
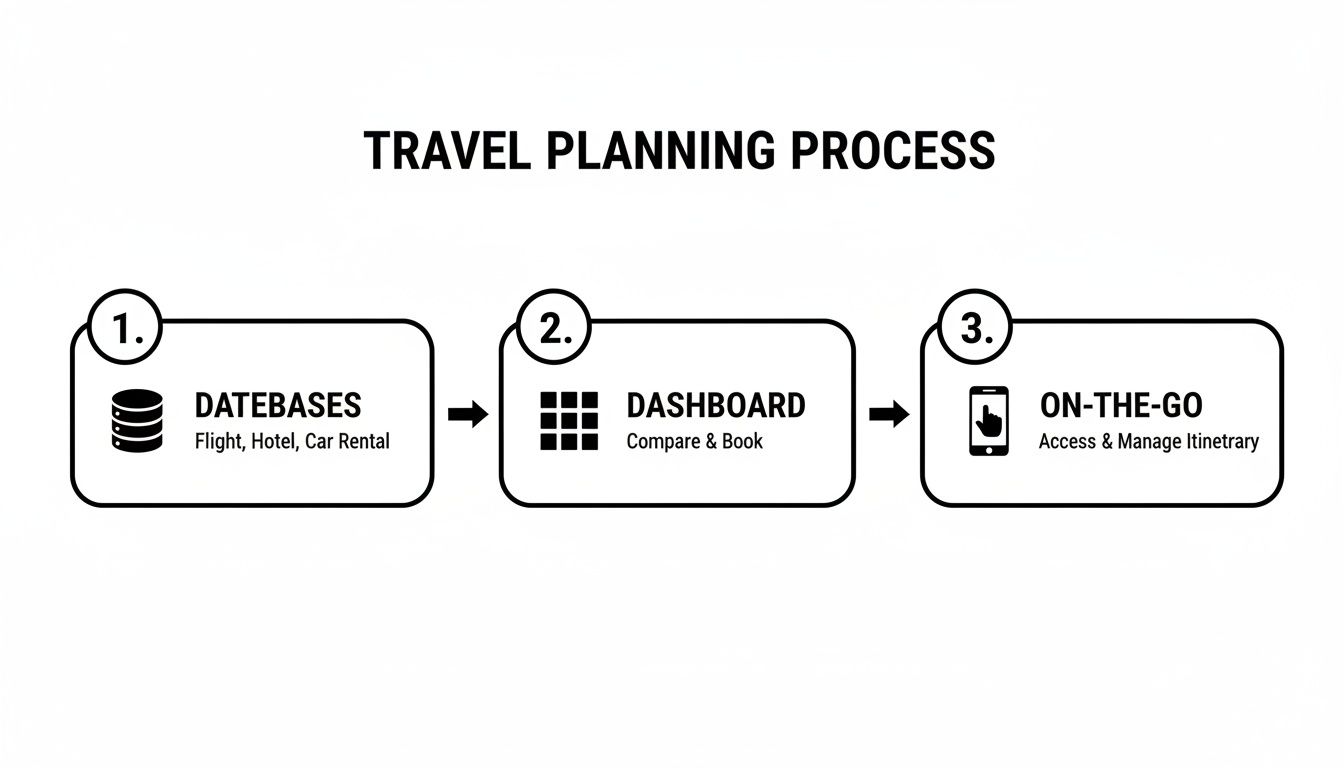
Automation is what truly connects your raw data to a practical planner you can actually use while you're standing in a busy airport.
Setting Up Your Email Workflow
Getting this system running is surprisingly straightforward. The main idea is to start treating your Notion database like another contact in your address book. Once you have that unique email for your bookings database, a few powerful workflows open up:
- Forward confirmations directly: The moment a booking email arrives, just hit forward.
- Use email filters: Take it a step further by setting up rules in Gmail or Outlook to automatically forward emails from specific senders (like airlines or hotel chains) to your Notion address.
- CC your database on new bookings: When you’re booking online, pop the unique database email into the CC field. The confirmation will be captured the second it's sent.
This transforms your planner from a static list into a dynamic system that actively keeps you organized. If you want to dive deeper into the nuts and bolts, our guide on saving emails to Notion provides a complete walkthrough.
The efficiency gains here are massive. When you pair a smart database structure with an integration like NotionSender, the results are incredible. You can have vendor quotes automatically sent, with costs extracted and dropped right into your budget tracker, all from a single forwarded email.
The goal is to touch each piece of information only once. Forward the email, and let the automation handle the rest. This simple shift in habit will save you countless hours over the long run.
Following this process ensures every important document has a permanent, organized home. You'll never again be that person frantically scrolling through their inbox for a rental car confirmation number while a line forms behind you. It'll be right there in your Notion planner, exactly where it belongs.
Alright, let's get into the good stuff. With your core databases and the main dashboard humming along, it's time to add the kind of features that take a planner from just good to genuinely indispensable.
We're talking about the pro moves that turn your Notion workspace into a smart assistant, not just a place to dump information. The whole point is to cut down on the repetitive busywork so you can actually focus on the fun parts of planning your next adventure.
<iframe width="100%" style="aspect-ratio: 16 / 9;" src="https://www.youtube.com/embed/GOy6uVrSjuA" frameborder="0" allow="autoplay; encrypted-media" allowfullscreen></iframe>
One of the most powerful tricks up Notion's sleeve is the template button. Think about it: every time you plan a new trip, say to Spain, you probably have a similar set of tasks. Instead of manually creating a new page and adding your packing list, budget tracker, and pre-trip checklist from scratch, a template button handles it all in a single click.
Just like that, it spins up a new trip page, pre-populated with all your essential checklists, filtered database views, and any other sections you always use. This one little feature creates a consistent, repeatable system that makes sure you never miss a critical step.
Building a World Traveler Stats Dashboard
Beyond just planning future trips, your Notion workspace can become a living, breathing record of your entire travel history. By setting up a “World Traveler Stats” dashboard, you can transform all that raw data into some really fun and insightful visuals. This isn’t just for bragging rights; it's about seeing the bigger picture of your journeys.
To get started, you just need to add a few new properties to your main Trips database:
- Countries Visited: A
Multi-selectproperty is perfect for tagging each country you visit on a trip. - Trip Type: Use a simple
Selectproperty with options like 'Business', 'Vacation', or 'Workcation'. - Days Traveled: A
Formulaproperty can automatically calculate the trip duration from your start and end dates. No more manual counting!
With these properties in place, you can use Rollups on a separate dashboard page to automatically tally up how many countries you’ve been to, the total number of days you've spent abroad, and even what percentage of your travel is for business versus pleasure.
For freelancers or digital nomads, this dashboard becomes a seriously practical tool. It's an easy way to keep an eye on business-related travel expenses or track the days you've spent in different countries, which can be a lifesaver for tax purposes. And if you're planning longer stays, keeping up with the latest digital nomad visa requirements is a critical piece of the puzzle.
A stats dashboard like this really elevates your planner. It’s no longer just an organizational tool—it's your personal travel log that tells the story of where you've been and helps inspire where you might go next.
Plenty of travelers use pre-made templates to get a jumpstart on this. For example, the 'World Traveler Stats' template by Mindful Yesmads lets people track things like flights taken (the global average is 8.5 per year), countries visited (which is rising 15% year-over-year to an average of 7.2), and total days on the road with just a bit of initial setup. It's fascinating to see how people are using these stats to turn their Notion planner into a powerful personal analytics tool.
Got Questions About Your Notion Travel Planner?
Once you start building out your travel command center in Notion, a few questions are bound to pop up. It's totally normal. Let's tackle some of the most common ones I hear, so you can get past any little hurdles and make this system work for you.
Can I Actually Use This on My Phone?
Yes, absolutely. This is one of the best parts about building in Notion — its mobile app for iOS and Android is fantastic. Everything you build on your computer is instantly available and works perfectly on your phone, with all your data synced up.
Honestly, this is a lifesaver when you're actually traveling. I can't tell you how many times I've pulled up a booking number at an airport counter or checked an address while hopping into a taxi, all from my phone. Pro tip: create a simple dashboard page just for mobile. I like to add views filtered for "Today's Agenda" or "Upcoming Bookings" so I don't have to hunt for what I need.
How Secure Is Forwarding All My Booking Emails?
That's a smart question to ask. Security is a big deal, and tools built for this kind of thing take it seriously. Integrations like NotionSender use secure connections, but the real magic is the unique, private email address you get for each database.
Think of it this way: that email address is known only to you. You're in complete control of what you send to it, creating a direct, encrypted path for your info to travel from your inbox to your planner.
Frankly, it's often a lot safer than manually copying and pasting sensitive details between different apps or open notes, which just increases the chances of that data getting exposed.
Can I Add This Automation to a Template I Already Use?
You bet. And it's way easier than you might think. You can bolt this kind of email automation onto any Notion travel planner, whether it's a template you just downloaded or a setup you’ve been tweaking for years. You definitely don't need to start from scratch.
Just go to the database where you keep your bookings or documents in your current setup. From there, you can generate a new, unique email address for it with an integration tool. You can start forwarding your confirmations and travel docs right away, and they'll start popping up in your planner just like we've been talking about.
Tired of all the manual data entry? NotionSender lets you forward booking confirmations, receipts, and flight details straight into your travel planner, keeping everything organized without the hassle. Start automating your travel planning today.