
Build a Powerful Notion Gantt Chart for Project Management
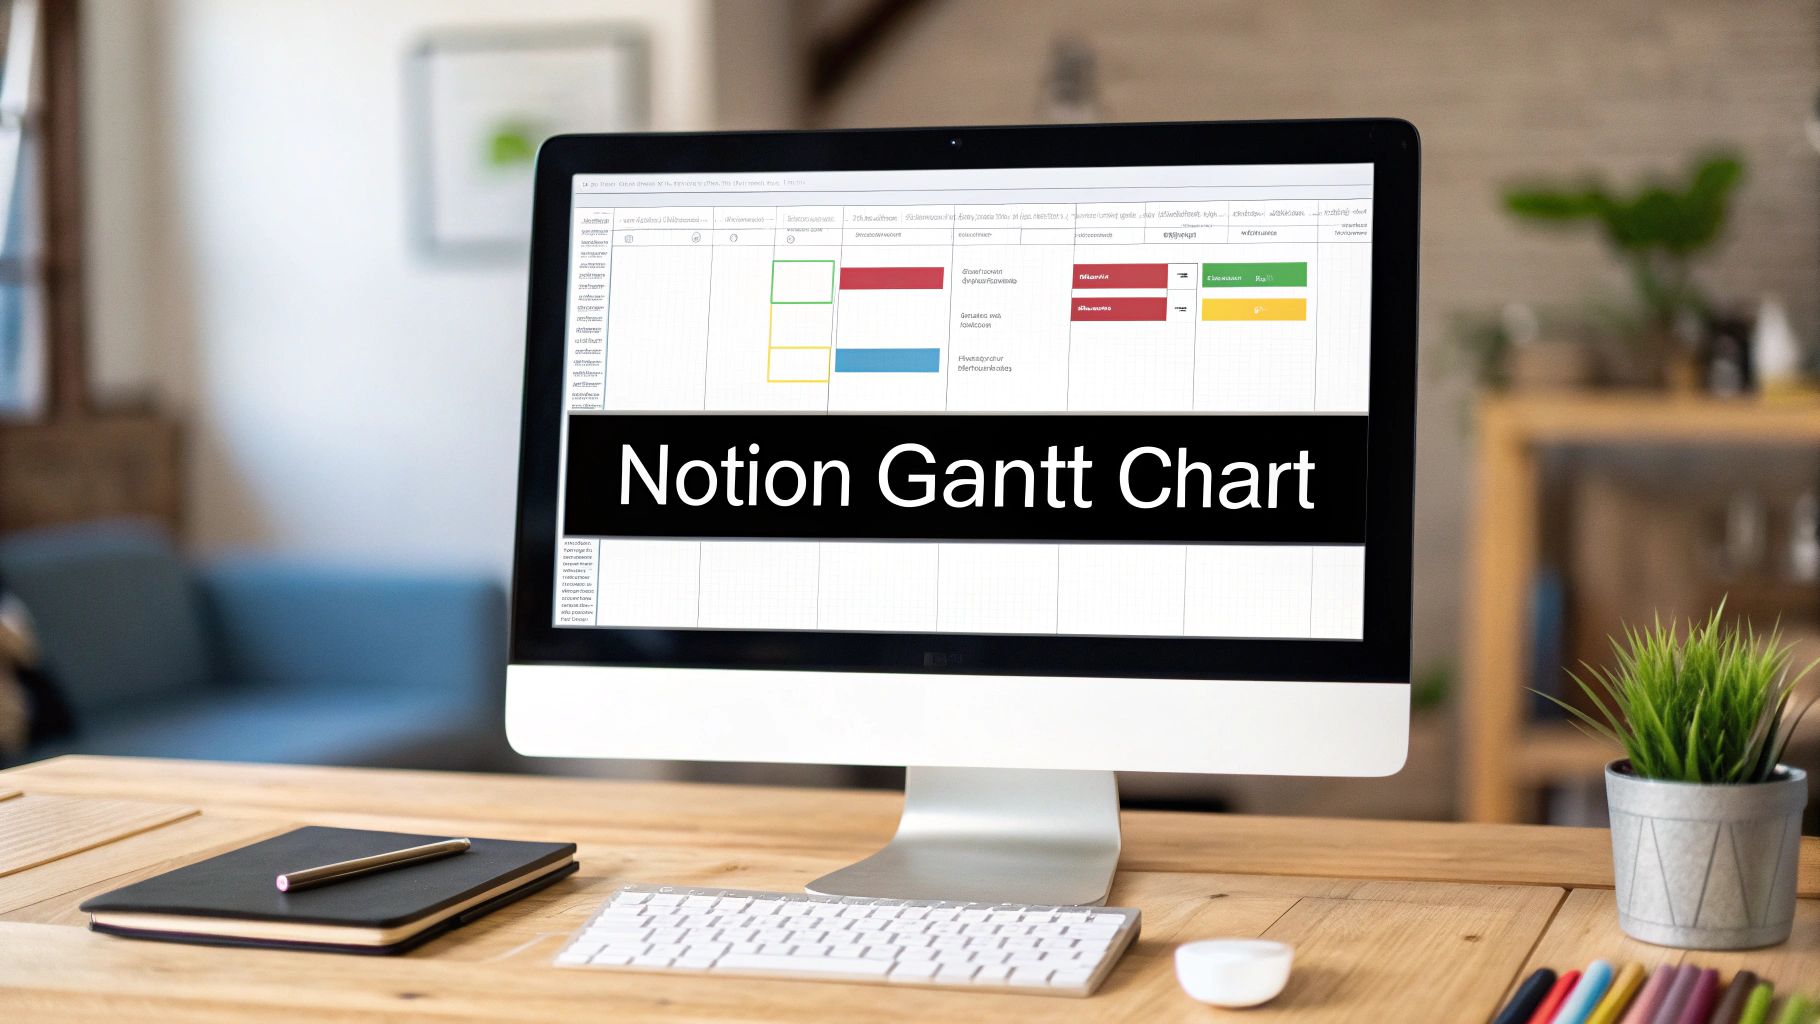
A Notion Gantt chart isn't some secret, hidden feature. It's simply the Timeline view applied to one of your project databases. This simple tweak transforms a basic task list into a dynamic, interactive roadmap for your entire project.
It’s a surprisingly powerful way to use Notion's existing tools for some seriously sophisticated project management.
Why a Notion Gantt Chart Will Transform Your Workflow

Before we jump into the "how," let's spend a minute on the "why." I've seen countless teams struggle with project information scattered across a half-dozen apps. The result is always the same: missed deadlines and zero visibility into how one person's work connects to another's.
A Gantt chart inside Notion solves this by creating a central command center for everything project-related.
Think about a marketing team launching a new product. The content writer is a few days behind, but because their task lives in a separate app, no one realizes it's about to delay the social media campaign and the paid ad launch.
With a shared Gantt chart in Notion, these dependencies are impossible to miss. A delay in one task visually nudges the entire connected timeline, letting the project manager spot and fix the bottleneck before it spirals out of control.
From Disorganized Lists to a Single Source of Truth
This visual approach is a massive upgrade from simple to-do lists. It gives stakeholders a clean, high-level overview while still holding all the granular details each team member needs to get their work done.
Here’s a quick look at the core benefits you can expect when you implement a Gantt chart in Notion.
| Benefit | Impact on Your Projects |
|---|---|
| All-in-One Workspace | No more bouncing between your task manager, calendar, and documents. Everything lives in one place. |
| Crystal-Clear Visibility | Everyone on the team sees the same plan, understands their role, and knows how their work impacts others. |
| Proactive Problem-Solving | Visual dependencies make it easy to spot potential conflicts or resource shortages well in advance. |
| Reduced Admin Overhead | You'll spend far less time in status meetings asking, "What's the update on this?" The chart is a live, accurate view. |
This shift from constantly chasing updates to proactively managing the project is the real game-changer. Your team ends up spending less time talking about the work and more time actually doing it.
In fact, with around 40% of small businesses reporting project delays due to poor visibility, this is a direct, practical solution. My own experience, and data from other teams, shows that this kind of visual planning can boost on-time delivery rates by as much as 25-30%.
Ultimately, building a Gantt chart in Notion is about creating a dynamic, adaptable system that grows and changes right alongside your project. For more ideas on leveling up your workspace, check out our guide on 10 tips to get the most out of Notion.
Right, let's get our hands dirty and build the foundation for your Gantt chart: the project database.
Every powerful Notion setup, especially for project management, starts with a well-structured database. Think of it as the central nervous system for your entire project. While you can quickly pop an inline database onto any page, I'm a big advocate for starting with a full-page database. It just gives you a dedicated, clean space to focus on the project without any other page clutter getting in the way.
Go ahead and create a new page in Notion, then choose the "Database - Full page" option. This blank canvas is where the magic begins. We're going to define the properties—the data fields—that will actually power your timeline. You can go wild with properties later, but for now, let's nail down the essentials.
Defining Your Core Properties
These aren't just random columns; each one plays a crucial role in making your Gantt chart functional and, more importantly, readable at a glance.
Here are the absolute non-negotiables you'll need:
- Task Name: This is your primary property, the
Titletype. It’s the actual name of the task, like "Draft Q3 Marketing Report" or "Design New Landing Page Mockups." - Dates: This one is critical. Add a
Dateproperty, and—this is important—make sure you toggle on the "End date" option. This gives you the start and end points that Notion uses to draw those neat bars on your timeline. - Status: A
Statusproperty is perfect for seeing where things stand. The default options ("To-do," "In progress," "Done") are usually fine to start with, but feel free to customize them to fit how your team works. Maybe you need an "In Review" or "Blocked" stage. - Assignee: Use a
Personproperty to tag team members. This immediately adds a layer of accountability and lets you filter the entire chart to see who’s working on what.
Pro Tip: Instead of one
Dateproperty with a start/end range, I sometimes create two separateDateproperties: "Start Date" and "End Date." This can give you a bit more flexibility down the line for creating advanced filters, like if you only want to sort tasks by their final due date.
With just these four properties, you've built the core structure. You're not just making a glorified to-do list; you're creating a relational system where every piece of information has a clear purpose.
Even Notion's official guides push this simple, database-first approach. Get your tasks in, set the dates, and then switch over to the Timeline view. It’s a method so effective that some of the most popular free templates, which get thousands of duplicates a week, are built on this exact principle. You can read more about Notion's own philosophy on Gantt charts and project management here. By getting these properties right from the start, you're ensuring that every task you add will show up correctly and give you meaningful information once you visualize the project.
Visualizing Your Projects with the Timeline View
So, you've built the database—that's the engine. Now it's time to build the beautiful, functional dashboard that will actually drive your project forward. This is where Notion’s Timeline view comes into its own, transforming that static list of tasks into a dynamic, interactive Notion Gantt chart.
The switch from a simple table to a timeline is where you really start to feel the power of managing projects in Notion. To make it happen, head over to your database and click the little + icon next to your existing views. From the layout options that pop up, select "Timeline" and give it a clear name like "Project Gantt View."
Instantly, Notion will try to lay out your tasks on a horizontal calendar. But it needs a few instructions from you to get it right.
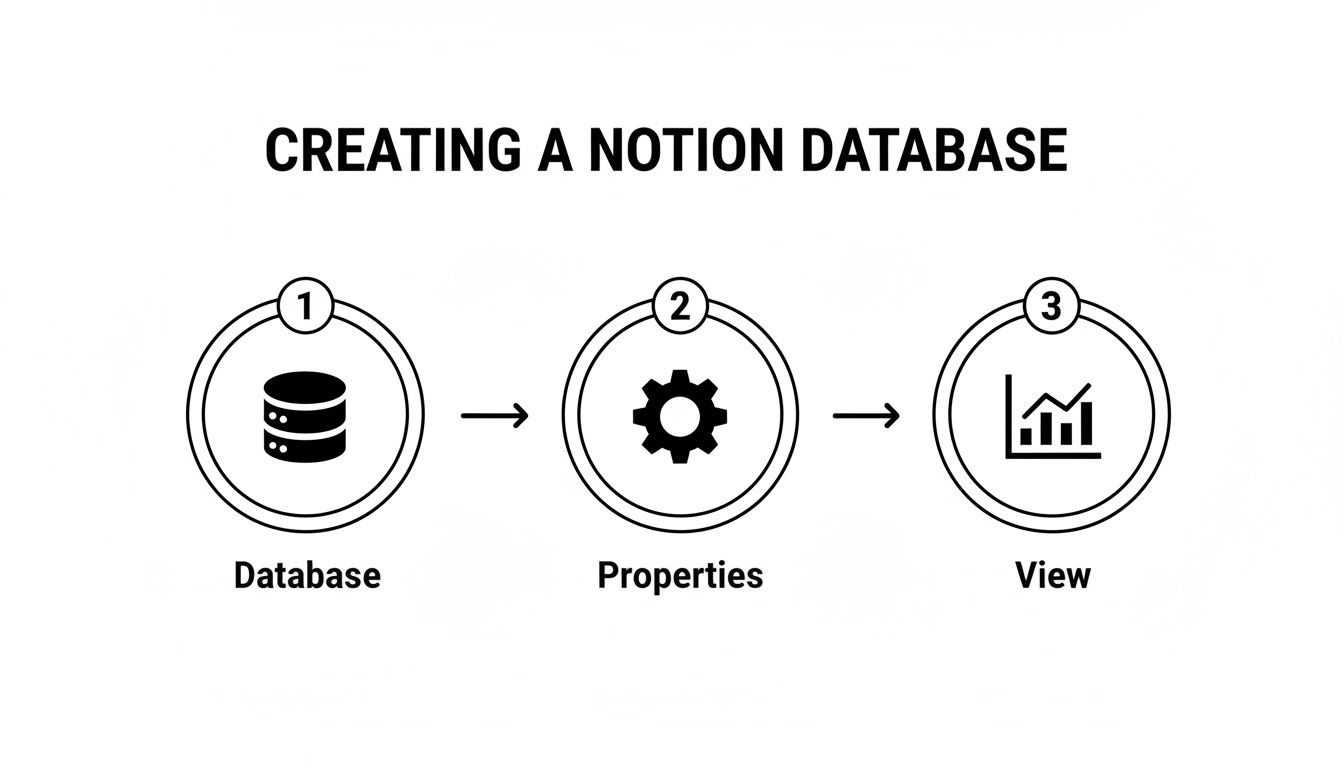
This simple flow—create a database, define its properties, and then add a view—is the fundamental process for building just about anything powerful in Notion. It’s a sequence that ensures your visual front-end is always backed by structured, reliable data.
Configuring Your Timeline for Clarity
The first thing you’ll probably notice is that Notion needs to know which dates to use. Click the ... menu in the top-right corner of your database and find the "Timeline by" option. This is where you'll select the Date property you created earlier (the one with both start and end dates enabled).
Once you’ve linked those dates, you'll see your tasks snap into place as bars on the timeline. Cool, right? Now, let's make it truly useful.
Go back to that ... menu and click "Properties." Think of this as your control panel for what information you see on the Gantt chart. I always recommend toggling on a few key properties to be visible right on the timeline bars themselves:
- Assignee: Seeing a team member's profile picture on each task bar gives you an immediate, at-a-glance understanding of who owns what.
- Status: Displaying the status lets you spot if a task is "In Progress" or "Blocked" without ever having to click into the page.
By making key data visible at a glance, you cut down on friction and save your team precious time. The goal is to get a complete project overview in under 30 seconds, and showing these properties directly on the timeline is how you get there.
Activating Dependencies to See the Full Picture
Now for the magic. This is where your Notion Gantt chart becomes a genuine project management tool. To see how tasks connect and affect one another, you need to enable dependencies. In the ... menu, find the "Dependencies" option and flip the toggle on.
Notion will then prompt you to set up the relationship. If you haven't already, you'll need to create a Relation property that links the database to itself. Just create one, name it something intuitive like "Dependencies," and then configure it to show two properties: "Blocked by" and "Blocking."
With that set up, you can now link tasks. For example, you can make "Publish Blog Post" officially blocked by "Write First Draft." As soon as you do, a clear arrow will appear on your timeline, connecting the two.
This visual connection is invaluable. If the first draft gets delayed, you’ll instantly see the knock-on effect on the publish date. This allows you to adjust the schedule proactively instead of reacting to a missed deadline. That's the core of effective project planning, right there.
Advanced Customization for Deeper Project Insights
Okay, you've got a basic timeline up and running. That's a great start, but now it’s time for the fun part—turning that simple project plan into a dynamic command center. A standard view is fine for seeing what's on the docket, but building tailored, intelligent views is what unlocks real, actionable insights. This is where we go from just tracking dates to actually understanding the project's pulse.
<iframe width="100%" style="aspect-ratio: 16 / 9;" src="https://www.youtube.com/embed/g1maiGeki6I" frameborder="0" allow="autoplay; encrypted-media" allowfullscreen></iframe>
Think about who's looking at your Gantt chart. A high-level stakeholder doesn't care about every single minor task; they just want to see the roadmap. On the flip side, a developer needs a laser-focused view of their immediate priorities, not the entire project scope. This is where advanced filters and sorts come into play.
By layering different filters, you can build some incredibly powerful, live dashboards. Imagine creating a view called "My Overdue Tasks." All it takes is a filter for tasks where the Assignee is Me and the End Date is before Today. This isn't some static report you have to run every morning. It's a constantly updated, personalized to-do list that lives right inside your project plan.
Adding Intelligence with Notion Formulas
This is where your Notion Gantt chart really starts to work for you. Formulas let you create new properties that calculate information based on your existing data, giving you context that a simple property just can't. You don't need to be a coding wizard, either. Many of the most useful formulas are surprisingly simple.
Here are a couple of my favorite examples to get you started:
- Days Remaining Counter: A formula like
dateBetween(prop("End Date"), now(), "days")gives you a live countdown to each task's deadline. Seeing "3 days left" is a lot more motivating and immediate than just staring at a date on a calendar. - Automated "At Risk" Flag: You can get even smarter by combining logic to create an early warning system. A formula could check if a task's status isn't "Done" and its deadline is within the next three days, automatically displaying a ⚠️ "At Risk" warning.
These little formulas transform your Gantt chart from a passive record of what's happening into an active system that flags potential issues before they become full-blown problems. It's all about building a proactive, not reactive, project management environment.
To help you get started, here's a quick rundown of some essential properties that bring a Gantt chart to life.
Essential Notion Properties for Gantt Charts
A comparison of standard and advanced Notion properties to enhance your project timeline.
| Property Type | Purpose in Gantt Chart | Example Use Case |
|---|---|---|
| Date | Sets the Start and End dates for the timeline view. This is the absolute core of the Gantt chart. | A "Website Launch" task has a start date of June 1st and an end date of June 30th. |
| Person | Assigns tasks to team members for accountability and personalized views. | The "Design Mockups" task is assigned to Jane, so she can filter for just her work. |
| Status | Tracks the current stage of a task (e.g., To-Do, In Progress, Done). | Marking a task as "Done" might trigger an automation or simply clear it from the active view. |
| Relation | Creates Dependencies by linking tasks together (blocking/blocked by). | The "Write Blog Post" task cannot start until the "Keyword Research" task is complete. |
| Formula | Calculates dynamic data, like progress or risk, based on other properties. | A formula displays a ⚠️ warning if a task is overdue and not yet completed. |
| Number | Manually or automatically tracks progress, often visualized with a progress bar. | A task's progress is set to 75%, showing it's nearing completion on the timeline. |
These properties are the building blocks. Once you master them, you can create a truly sophisticated and intuitive project management system.
Standardizing Your Workflow with Database Templates
Consistency is everything in project management. If every team member sets up tasks in their own unique way, your data quickly becomes a messy, unreliable nightmare. Database templates are the solution. They let you pre-configure new pages in your project database so everyone starts from the same place.
For instance, you could create a "New Marketing Task" template. Whenever someone on the team clicks it, the new task page automatically loads with:
- A pre-filled icon and cover image for visual consistency.
- Default properties, like setting the initial status to "To-Do."
- A checklist of standard sub-tasks, like "Draft copy," "Get approval," and "Schedule post."
This simple step ensures every task is created with the right structure from the get-go, saving time and keeping your Gantt chart clean and organized. For those looking to push automation even further, you can explore programmatic solutions. The documentation for tools like NotionSender offers great insights on how you can interact with Notion databases via an API. This approach lets you build a system that delivers a clear roadmap for stakeholders and a detailed sprint plan for the team—all from a single, reliable source of truth.
A great project plan is only as good as its connection to the real world. Your Notion Gantt chart shouldn't just be a static document; it needs to be a living, breathing hub that interacts with your team and clients. This is where you can bridge the gap between planning and execution by plugging your communication channels directly into your timeline.
Tools like NotionSender make this happen, turning your chart from a simple visual into an active command center. All that manual busywork of copying info between your email and your project plan? It can be completely automated.

This image nails the core idea: linking your mobile communications directly to your project management workspace on your laptop, creating a seamless flow of information.
Automating Inbound Requests
Picture this: a client emails you with a new, urgent feature request. The old way meant manually creating a new task, copying the details over, setting the dates, and assigning it out. It's slow, tedious, and a perfect recipe for important details getting lost in translation.
With an integration, that whole process changes. You just forward that client's email to a unique address tied directly to your project database.
The email instantly pops up as a new task right on your Notion Gantt chart. The subject becomes the task name, and the email body is saved neatly inside the page content. No more copy-pasting—just a simple forward.
This kind of automation ensures every request is captured and nothing falls through the cracks. It also means your project timeline is always up-to-date with the latest stakeholder feedback and client needs, making your Notion Gantt chart a true single source of truth.
Triggering Outbound Notifications
The automation works both ways. You can also set up your Gantt chart to fire off emails based on changes you make to a task. This is incredibly powerful for keeping stakeholders in the loop without you lifting a finger.
Think about these scenarios:
- Status Change: You drag a task from "In Progress" to "Awaiting Review." An email automatically shoots off to the project manager or client with a link to the work.
- Deadline Approaching: A task is three days from its due date. An automated reminder email gets sent to the person assigned to it.
- Task Completion: A task is marked "Done." A confirmation email goes out to the client, letting them know the work is complete.
Setting this up connects your project management actions directly to your communication. Of course, when you're automating emails, it's important to make sure they actually land in the inbox. Learning a bit about email deliverability can help ensure your automated updates are always seen.
By connecting your email, you transform your Gantt chart from a passive planning tool into an active, communicative hub that keeps everyone perfectly in sync. You can get started and create a unique email address for your Notion database to begin automating this workflow today.
Got Questions About Your Notion Gantt Chart?
As you start weaving a Notion Gantt chart into your project management, you're bound to run into a few specific questions. That's totally normal. Getting the hang of the little details is what turns a basic timeline into a command center you can rely on. Let's walk through some of the most common things people ask so you can sidestep those roadblocks.
We’ll cover everything from linking tasks together to showing off your progress to clients. Mastering these few settings is the key to unlocking the full power of your new setup.
Can I Create Dependencies Between Tasks in Notion?
Yes, you absolutely can—and you should! This is one of the features that makes Notion's Timeline view a true Gantt chart. To get this working, you’ll need to set up a Relation property inside your database that points right back at itself.
I find it works best to name the two sides of the relation "Blocked by" and "Blocking." Once that property is created, here's what to do:
- Click the
...menu in the top-right corner of your Timeline view. - Find and select "Dependencies."
- Flip the toggle on and tell Notion to use your new "Blocked by" and "Blocking" properties.
The moment you do this, you'll see slick little arrows pop up on your timeline, visually connecting the tasks you've linked. It's a game-changer for spotting the critical path and instantly seeing how one little delay could ripple through the entire project.
How Do I Show Project Progress on the Timeline?
Getting a progress bar to show up right on the timeline is one of my favorite visual tricks. It gives you an instant, at-a-glance status update for every single task.
First, you'll need to add a Number property to your database. You can call it something intuitive like "Progress" or "Completion %."
Next, click to edit that new property and change its format. You can set it to Percent, which is fine, but the real magic happens when you select Progress Bar. Now, as you update the number for each task—say, you type 75 for 75% done—a visual bar will fill up.
To get this to show up on your Gantt chart, just open the "Properties" menu for the Timeline view and toggle your "Progress" property to "Show."
This one small tweak turns your chart into a living dashboard. Stakeholders can immediately see how the project is tracking without having to click on a single task, which saves a ton of time in status meetings.
Is It Possible to Share My Gantt Chart with Clients?
Notion makes it incredibly easy to share a live view of your timeline with clients or anyone else outside your workspace. The best way to do this is with a public, read-only link.
Just hit the "Share" button at the top-right of the Notion page and flip the "Share to web" toggle on. Copy that link, and you're good to go. Anyone with the link can see the project timeline—no Notion account required—and it updates in real-time as you make changes. It’s perfect for keeping clients in the loop without giving them edit access.
If you need a bit more collaboration, you can invite external partners as "Guests" to the page. They'll need to sign up for a free Notion account, but this gives them the ability to leave comments or, if you allow it, even edit specific tasks. It's a super flexible way to handle different levels of stakeholder involvement.
Ready to connect your project plan to your inbox? NotionSender automates the tedious task of moving information between your email and your Notion workspace. Turn client requests into tasks instantly and send project updates automatically. Visit https://www.notionsender.com to get started.

